Nowadays, the car expression instrument (16×16 LED array) is very popular. On Taobao, it is necessary to fix a few expressions (non-array) to about 150, and you can customize the expression. The 16×16 is more than 200 small and 300 pieces. I feel that DIY has a very low cost, so I first make an 8×8 expression matrix. The car is too small to be placed on the work station. Hahaha.
Generally, if you control the LED array, each 8×8 array uses a matrix of max7219 (about 5 yuan, 1 chip, which is very expensive) matrix control, or use two 74HC595 latches (about 0.5 yuan 1 sheet). I bought two 74HC595, but I think that an 8×8 array should theoretically be able to use a 89c51 directly (89c51 has 32 data feet, arduino is not enough), and the simulation experiment is successful, saving 1 dollar (2 Tablet 595), haha. Below is the finished picture and the video I recorded. I have drawn 6 picture switches. You can make more pictures by using your imagination. I took the time to make it out in 2 days (simulation experiment and schematic I have already done it before N days. This DIY manual estimate actually costs 40 minutes of welding and 1 hour of debugging).
Want to see more powerful dynamic effects, please go to the sofa to watch the video
1 Tools and materials

â—‹ 8x8 LED array, purchased by Taobao, priced at 4.7 yuan (later found on diytrade.com, if you buy 32 tablets at a time, only 0.7 yuan);
â—‹ STC89C52RC one-chip computer, Taobao purchased, unit price 3.7 yuan; â—‹ 51 minimum system board, Taobao purchase, unit price 3.9 (this is a loss to earn credit prices, now the seller has increased prices to 9.9 yuan. Another 5.8 yuan price, Smaller, no serial port and 232 chip, workmanship is also a level. It is better to buy a system of 9.9 yuan.); â—‹ hole plate, Taobao purchase, unit price 0.4 yuan; â—‹ one touch switch, Taobao purchase price 0.4 Yuan (must buy a cover, feel a lot better); â—‹ FC plug, Taobao purchased, 10 sets of price 2.5 yuan. This experiment needs to use 4 sets of plugs, 2 sets of sockets; â—‹ FC line, Taobao purchased, 100cm price 5 yuan, this experiment used 9 cm and 11 cm each section; â—‹ 200 ohms one block, Taobao purchased The unit price is 0.4 yuan (8 pieces of single resistance in the picture, Taobao buy, 100 pieces of price 1 yuan. There is just one exclusion on hand, you can weld 7 feet less, use it); â—‹ Battery box and 1.2V battery four , own; â—‹ maintenance line, Taobao purchased, 20 meters price 2 yuan (the black circle in the figure. It is a very thin enameled wire, when the wire is used); â—‹ pin 3P, Taobao purchase, 40P price 0.25 yuan ( There is no one in the above picture; â—‹ 40 ohm resistor, own, purchase 100 pieces 1 yuan (not shown in the above figure, it is found that the voltage needs to be reduced during debugging, otherwise the low level is not low enough, there will be light leakage at the point where it is not bright )

Essential tools:
â— PC; â— Electric soldering iron; â— Solder; â— Rosin; â— Multimeter; â— Scorpion
For debugging:
â— MCU development board (and burner) 170 yuan; â— bread board 4 yuan; â— bread line 70 6.5 yuan; â— DuPont line (color line) 40 6 yuan 2 build prototype on the simulation software, write the program code ,debugging

â— Simulation experiment schematic diagram. â— I am using proteus. Click here to download the source code package, which contains the simulation experiment file (.dsn). If you download my experimental source code package directly, this step can be omitted, directly burn martrix_pure.hex to the microcontroller. 3 Use a multimeter to measure the pins of the array to determine the wiring method.

â— If you bought 1588abeg, the picture above is my good manual. â— If you use the multimeter's diode file to measure the array, vcc means the red stick and gnd means the black stick. When the multimeter's watch bar touches the corresponding pin, a selected column of a certain row will light up. Array displays typically use row or column scans. Image point interpretation scan: Suppose first connect vcc to the upper right corner of the array, then connect vcc and gnd to the upper left corner 1 to 8 respectively. If gnd is connected, then vcc is shaped into a loop, and a point on the first line is lit up. This process is called scanning one line. Next, scan the second line, the third line... If more than 30 full-screen scans are performed in one second, the human eye can see the still image. Because the arrays in the arrays and emulators that were purchased were rotated 90 degrees, in essence, this experiment used column scans. ^_^â— If the array you bought is with instructions, this step can be omitted. 4 Choose the most pleasing way to place components

â— Put the components on the board and put them on the board to see how the emissions are beautiful. 5 Control the schematic diagram of the simulation experiment, using wire bonding

â— Use the vise to make the FC line, and make one for each of 9cm and 11cm. When welding, I used an electrical maintenance line with a wire diameter of 0.1mm. I don't need to scrape the paint. The soldering iron can directly burn the paint, and the direct soldering will do. Due to my layout, there are so many lines crossed here. It is more difficult to use this kind of wire welding. It is not visible to the naked eye whether the patent leather is burned off. If you are not careful, the two wires will be short-circuited together. You can choose to use a wire with a skin, or use the FC cable directly to solder, so as not to be like me. It took a long time to weld before it was successful. (Or put the two FC heads on the left side of the figure below, the situation of the line will be much better. Before I soldered the wire, I soldered the components to the board first, and I couldn't remove it. I could only harden the scalp. .) 6 connected to the development board, for the microcontroller programming, debugging

â— If you burn my hex file, you can omit the debugging step and burn it directly. â— If you don't have a 51 development board, it doesn't matter. Taobao buys a USB to 232 cable, and then connects to the minimum system in the original list, which can be directly burned using STC's official burning program. Because the electrical performance of the original in the simulation software is infinite and powerful (no breakdown, no loop voltage, low level is absolute 0, high level is standard 3.3 or 5V), so in practical applications, you need Calculate the voltage drop of the LED and add some external components. In addition, you may find other problems when debugging, and then fix the bug.

â— When debugging the DuPont line, it is recommended to use the order of brown 1 red 2 orange 3 yellow 4 green 5 blue 6 purple 7 gray 8 white 9 black 0, so that it is convenient to view. The color ring resistance inductances are also arranged in this color code order.

â— After the program is burned, it will be executed automatically. Look, the beautiful picture is displayed. After debugging, I found that a 40 ohm resistor was used to voltage drop on the power supply. A blue resistor in the lower right corner of the figure is 42 ohms. I have already made up the schematic. 7 Take the MCU from the development board and plug it into the small system to complete

â— There is a 42-ohm resistor on the board. There is no list in the raw materials.
Finished!
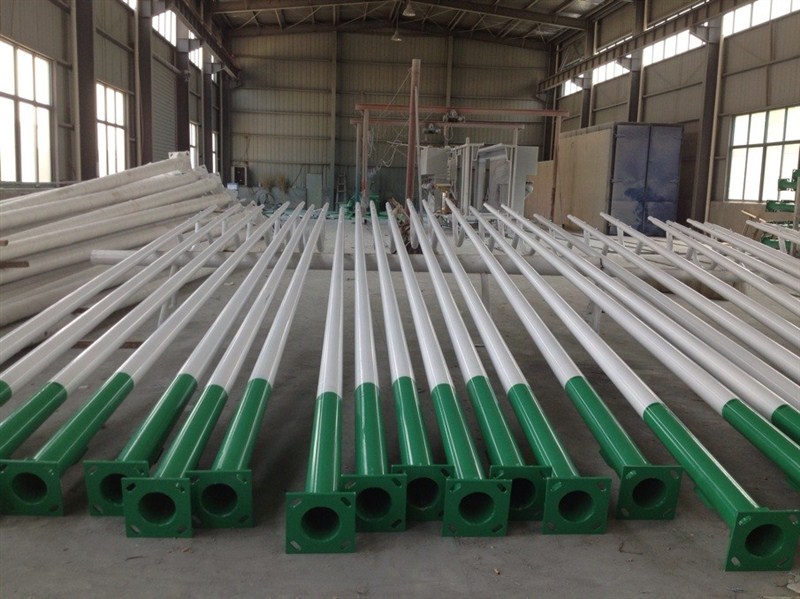
Pole Height: Hot-Dip Galvanized, Q235 Painting Plastic,4M-15M For Choosing
Pole And Lamp Fixture Color: Grey, White, Black, Blue, Green, EtcPole Shape: Tapered, Square, Hexagonal, Octagonal, Etc
Testing Including:
1.Material testing
2.Shape testing
3.testing after Galvanizaiton
4. Tensile testing
5.Fittings check


Steel Pole
Steel Pole,Galvanized Steel Pole,Street Lamp Steel Pole,Steel Solar Street Light Pole
Yangzhou Bright Solar Solutions Co., Ltd. , https://www.cnbrightsolar.com